TensorFlow学习——Tensorflow Object Detection API(2.目标检测篇)_tensorflow object detection api检测-程序员宅基地
技术标签: Tensorflow Object Detection AP 深度学习/机器学习 API 深度学习【理论+实践】 TensorFlow
2017 年 6 月, Google 公司开放了 TensorFlow Object Detection API 。 这 个项目使用 TensorFlow 实现了大多数深度学习目标检测框架,真中就包括Faster R-CNN。
本系列文章将
(1)先介绍如何安装 TensorFlow Object Detection API;
(2)再介绍如何使用已经训练好的模型进行物体检测 ;
(3)最后介绍如何训练自己的 模型;
之前已经完成了安装篇的讲解(Tensorflow Object Detection API安装)安装环境如果是win10 CPU的话请参考(win10 CPU Tensorflow Object Detection API安装与测试)
本文讲基于已有的训练模型做目标检测。
TensorFlow Object Detection API 默认提供了 5 个预训练模型,都是使用 coco 数据集训练完成的,结构分别为
SSD+MobileNet、 (想了解网络结构可参考Mobilenet的模型结构和MobileNet-SSD的模型结构)
SSD+Inception、
R-FCN+ResNet10I 、
Faster RCNN+ResNetl0l 、
Faster RCNN+Inception_ResNet
官方给了一个检测的例子,在object_detection 文件夹下 有个 object_detection_tutorial.ipynb 文件,运行方式是:打开anaconda prompt(类似cmd,假设你前提已经安装了jupyter notebook),将工作路径切换到object_detection目录,输入jupyter notebook; 然后就出现网页交互式的界面。输入指令如下:
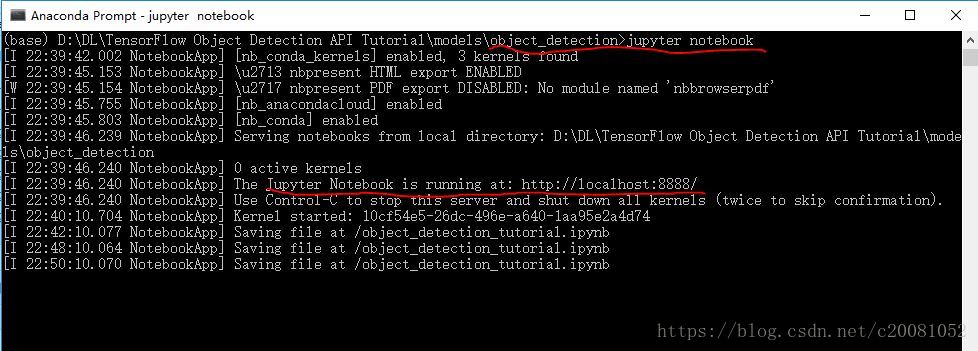
使用“Shift+Enter”组合键对.ipynb文件一一执行。该文件的源码和执行结果如下:
#Object Detection Demo
#Welcome to the object detection inference walkthrough! This notebook will walk you #step by step through the process of using a pre-trained model to detect objects in #an image. Make sure to follow the installation instructions before you start.
#Imports
import numpy as np
import os
import six.moves.urllib as urllib
import sys
import tarfile
import tensorflow as tf
import zipfile
from collections import defaultdict
from io import StringIO
from matplotlib import pyplot as plt
from PIL import Image
## Env setup
# This is needed to display the images.
%matplotlib inline
# This is needed since the notebook is stored in the object_detection folder.
sys.path.append("..")
## Object detection imports
Here are the imports from the object detection module.
from utils import label_map_util
from utils import visualization_utils as vis_util
# Model preparation
## Variables
#Any model exported using the `export_inference_graph.py` tool can be loaded here #simply by changing `PATH_TO_CKPT` to point to a new .pb file.
#By default we use an "SSD with Mobilenet" model here. See the [detection model zoo](https://github.com/tensorflow/models/blob/master/object_detection/g3doc/detection_mo#del_zoo.md) for a list of other models that can be run out-of-the-box with varying #speeds and accuracies.
# What model to download.
MODEL_NAME = 'ssd_mobilenet_v1_coco_11_06_2017'
MODEL_FILE = MODEL_NAME + '.tar.gz'
DOWNLOAD_BASE = 'http://download.tensorflow.org/models/object_detection/'
# Path to frozen detection graph. This is the actual model that is used for the object detection.
PATH_TO_CKPT = MODEL_NAME + '/frozen_inference_graph.pb'
# List of the strings that is used to add correct label for each box.
PATH_TO_LABELS = os.path.join('data', 'mscoco_label_map.pbtxt')
NUM_CLASSES = 90
## Download Model
opener = urllib.request.URLopener()
opener.retrieve(DOWNLOAD_BASE + MODEL_FILE, MODEL_FILE)
tar_file = tarfile.open(MODEL_FILE)
for file in tar_file.getmembers():
file_name = os.path.basename(file.name)
if 'frozen_inference_graph.pb' in file_name:
tar_file.extract(file, os.getcwd())
## Load a (frozen) Tensorflow model into memory.
detection_graph = tf.Graph()
with detection_graph.as_default():
od_graph_def = tf.GraphDef()
with tf.gfile.GFile(PATH_TO_CKPT, 'rb') as fid:
serialized_graph = fid.read()
od_graph_def.ParseFromString(serialized_graph)
tf.import_graph_def(od_graph_def, name='')
## Loading label map
#Label maps map indices to category names, so that when our convolution network #predicts `5`, we know that this corresponds to `airplane`. Here we use internal #utility functions, but anything that returns a dictionary mapping integers to #appropriate string labels would be fine
label_map = label_map_util.load_labelmap(PATH_TO_LABELS)
categories = label_map_util.convert_label_map_to_categories(label_map, max_num_classes=NUM_CLASSES, use_display_name=True)
category_index = label_map_util.create_category_index(categories)
## Helper code
def load_image_into_numpy_array(image):
(im_width, im_height) = image.size
return np.array(image.getdata()).reshape(
(im_height, im_width, 3)).astype(np.uint8)
# Detection
# For the sake of simplicity we will use only 2 images:
# image1.jpg
# image2.jpg
# If you want to test the code with your images, just add path to the images to the TEST_IMAGE_PATHS.
PATH_TO_TEST_IMAGES_DIR = 'test_images'
TEST_IMAGE_PATHS = [ os.path.join(PATH_TO_TEST_IMAGES_DIR, 'image{}.jpg'.format(i)) for i in range(1, 3) ]
#TEST_IMAGE_PATHS = ['test_images']
# Size, in inches, of the output images.
IMAGE_SIZE = (12, 8)
with detection_graph.as_default():
with tf.Session(graph=detection_graph) as sess:
for image_path in TEST_IMAGE_PATHS:
image = Image.open(image_path)
# the array based representation of the image will be used later in order to prepare the
# result image with boxes and labels on it.
image_np = load_image_into_numpy_array(image)
# Expand dimensions since the model expects images to have shape: [1, None, None, 3]
image_np_expanded = np.expand_dims(image_np, axis=0)
image_tensor = detection_graph.get_tensor_by_name('image_tensor:0')
# Each box represents a part of the image where a particular object was detected.
boxes = detection_graph.get_tensor_by_name('detection_boxes:0')
# Each score represent how level of confidence for each of the objects.
# Score is shown on the result image, together with the class label.
scores = detection_graph.get_tensor_by_name('detection_scores:0')
classes = detection_graph.get_tensor_by_name('detection_classes:0')
num_detections = detection_graph.get_tensor_by_name('num_detections:0')
# Actual detection.
(boxes, scores, classes, num_detections) = sess.run(
[boxes, scores, classes, num_detections],
feed_dict={image_tensor: image_np_expanded})
# Visualization of the results of a detection.
vis_util.visualize_boxes_and_labels_on_image_array(
image_np,
np.squeeze(boxes),
np.squeeze(classes).astype(np.int32),
np.squeeze(scores),
category_index,
use_normalized_coordinates=True,
line_thickness=8)
plt.figure(figsize=IMAGE_SIZE)
plt.imshow(image_np)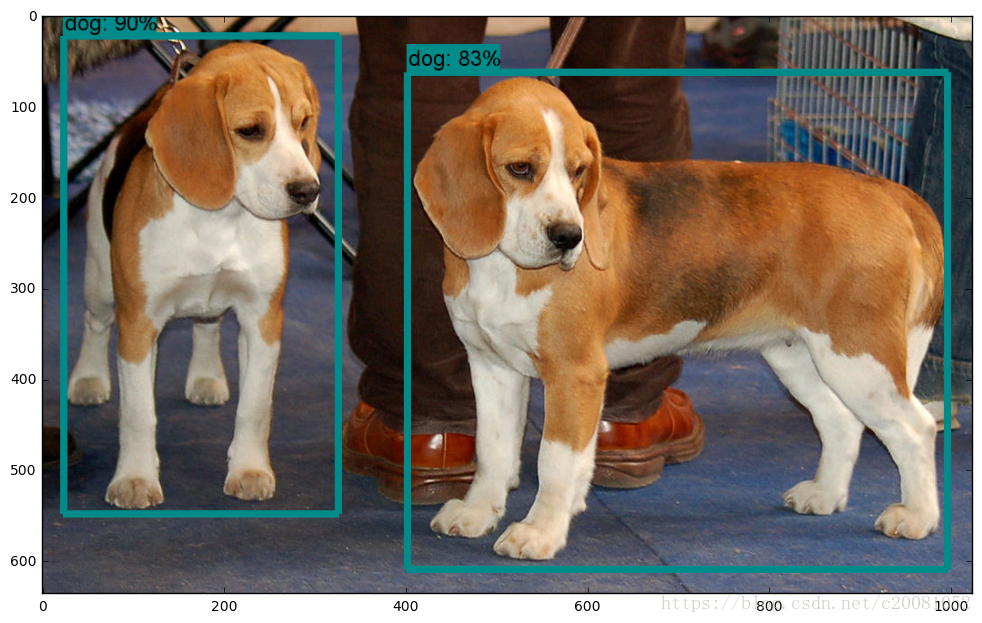

以上程序是以SSD + MobileNet的网络结构为例子,你可可以将MODEL_NAME的内容替换成以下内容。
MODEL_NAME =’ssd_inception_v2_coco_11_06_2017'
MODEL NAME = 'rfcn_resnet101_coco_11_06_2017'
MODEL NAME =’faster_rcnn_resnet10l_coco_11_06_2017 ’
MODEL NAME =’ faster_rcnn_inception_resnet_v2_atrous_coco_11_06_2017'
模型的下载地址为 Tensorflow预训练模型下载
可自行对比各个模型结构的检测性能。
智能推荐
5个超厉害的资源搜索网站,每一款都可以让你的资源满满!_最全资源搜索引擎-程序员宅基地
文章浏览阅读1.6w次,点赞8次,收藏41次。生活中我们无时不刻不都要在网站搜索资源,但就是缺少一个趁手的资源搜索网站,如果有一个比较好的资源搜索网站可以帮助我们节省一大半时间!今天小编在这里为大家分享5款超厉害的资源搜索网站,每一款都可以让你的资源丰富精彩!网盘传奇一款最有效的网盘资源搜索网站你还在为找网站里面的资源而烦恼找不到什么合适的工具而烦恼吗?这款网站传奇网站汇聚了4853w个资源,并且它每一天都会持续更新资源;..._最全资源搜索引擎
Book类的设计(Java)_6-1 book类的设计java-程序员宅基地
文章浏览阅读4.5k次,点赞5次,收藏18次。阅读测试程序,设计一个Book类。函数接口定义:class Book{}该类有 四个私有属性 分别是 书籍名称、 价格、 作者、 出版年份,以及相应的set 与get方法;该类有一个含有四个参数的构造方法,这四个参数依次是 书籍名称、 价格、 作者、 出版年份 。裁判测试程序样例:import java.util.*;public class Main { public static void main(String[] args) { List <Book>_6-1 book类的设计java
基于微信小程序的校园导航小程序设计与实现_校园导航微信小程序系统的设计与实现-程序员宅基地
文章浏览阅读613次,点赞28次,收藏27次。相比于以前的传统手工管理方式,智能化的管理方式可以大幅降低学校的运营人员成本,实现了校园导航的标准化、制度化、程序化的管理,有效地防止了校园导航的随意管理,提高了信息的处理速度和精确度,能够及时、准确地查询和修正建筑速看等信息。课题主要采用微信小程序、SpringBoot架构技术,前端以小程序页面呈现给学生,结合后台java语言使页面更加完善,后台使用MySQL数据库进行数据存储。微信小程序主要包括学生信息、校园简介、建筑速看、系统信息等功能,从而实现智能化的管理方式,提高工作效率。
有状态和无状态登录
传统上用户登陆状态会以 Session 的形式保存在服务器上,而 Session ID 则保存在前端的 Cookie 中;而使用 JWT 以后,用户的认证信息将会以 Token 的形式保存在前端,服务器不需要保存任何的用户状态,这也就是为什么 JWT 被称为无状态登陆的原因,无状态登陆最大的优势就是完美支持分布式部署,可以使用一个 Token 发送给不同的服务器,而所有的服务器都会返回同样的结果。有状态和无状态最大的区别就是服务端会不会保存客户端的信息。
九大角度全方位对比Android、iOS开发_ios 开发角度-程序员宅基地
文章浏览阅读784次。发表于10小时前| 2674次阅读| 来源TechCrunch| 19 条评论| 作者Jon EvansiOSAndroid应用开发产品编程语言JavaObjective-C摘要:即便Android市场份额已经超过80%,对于开发者来说,使用哪一个平台做开发仍然很难选择。本文从开发环境、配置、UX设计、语言、API、网络、分享、碎片化、发布等九个方面把Android和iOS_ios 开发角度
搜索引擎的发展历史
搜索引擎的发展历史可以追溯到20世纪90年代初,随着互联网的快速发展和信息量的急剧增加,人们开始感受到了获取和管理信息的挑战。这些阶段展示了搜索引擎在技术和商业模式上的不断演进,以满足用户对信息获取的不断增长的需求。
随便推点
控制对象的特性_控制对象特性-程序员宅基地
文章浏览阅读990次。对象特性是指控制对象的输出参数和输入参数之间的相互作用规律。放大系数K描述控制对象特性的静态特性参数。它的意义是:输出量的变化量和输入量的变化量之比。时间常数T当输入量发生变化后,所引起输出量变化的快慢。(动态参数) ..._控制对象特性
FRP搭建内网穿透(亲测有效)_locyanfrp-程序员宅基地
文章浏览阅读5.7w次,点赞50次,收藏276次。FRP搭建内网穿透1.概述:frp可以通过有公网IP的的服务器将内网的主机暴露给互联网,从而实现通过外网能直接访问到内网主机;frp有服务端和客户端,服务端需要装在有公网ip的服务器上,客户端装在内网主机上。2.简单的图解:3.准备工作:1.一个域名(www.test.xyz)2.一台有公网IP的服务器(阿里云、腾讯云等都行)3.一台内网主机4.下载frp,选择适合的版本下载解压如下:我这里服务器端和客户端都放在了/usr/local/frp/目录下4.执行命令# 服务器端给执_locyanfrp
UVA 12534 - Binary Matrix 2 (网络流‘最小费用最大流’ZKW)_uva12534-程序员宅基地
文章浏览阅读687次。题目:http://acm.hust.edu.cn/vjudge/contest/view.action?cid=93745#problem/A题意:给出r*c的01矩阵,可以翻转格子使得0表成1,1变成0,求出最小的步数使得每一行中1的个数相等,每一列中1的个数相等。思路:网络流。容量可以保证每一行和每一列的1的个数相等,费用可以算出最小步数。行向列建边,如果该格子是_uva12534
免费SSL证书_csdn alphassl免费申请-程序员宅基地
文章浏览阅读504次。1、Let's Encrypt 90天,支持泛域名2、Buypass:https://www.buypass.com/ssl/resources/go-ssl-technical-specification6个月,单域名3、AlwaysOnSLL:https://alwaysonssl.com/ 1年,单域名 可参考蜗牛(wn789)4、TrustAsia5、Alpha..._csdn alphassl免费申请
测试算法的性能(以选择排序为例)_算法性能测试-程序员宅基地
文章浏览阅读1.6k次。测试算法的性能 很多时候我们需要对算法的性能进行测试,最简单的方式是看算法在特定的数据集上的执行时间,简单的测试算法性能的函数实现见testSort()。【思想】:用clock_t计算某排序算法所需的时间,(endTime - startTime)/ CLOCKS_PER_SEC来表示执行了多少秒。【关于宏CLOCKS_PER_SEC】:以下摘自百度百科,“CLOCKS_PE_算法性能测试
Lane Detection_lanedetectionlite-程序员宅基地
文章浏览阅读1.2k次。fromhttps://towardsdatascience.com/finding-lane-lines-simple-pipeline-for-lane-detection-d02b62e7572bIdentifying lanes of the road is very common task that human driver performs. This is important ..._lanedetectionlite