1、背景
现在app中,图片预览功能肯定是少不了的,用户基本已经形成条件反射,看到小图,点击看大图,看到大图两个手指开始进行放大,放大后,开始移动到指定部位~~~
我相信看图的整个步骤,大家或者说用户应该不希望被打断把~~~“我擦,竟然不能放大,什么玩意,卸了~~“ , "我擦,竟然不能移动,留有何用,卸了~~"。
哈~所以对于图片的预览,一来,我们要让用户爽;二来,我们作为开发者,也得知道如何实现~~~
2、概述
想要做到图片支持多点触控,自由的进行缩放、平移,需要了解几个知识点:Matrix , GestureDetector , ScaleGestureDetector 以及事件分发机制,ps:不会咋办,不会你懂的。
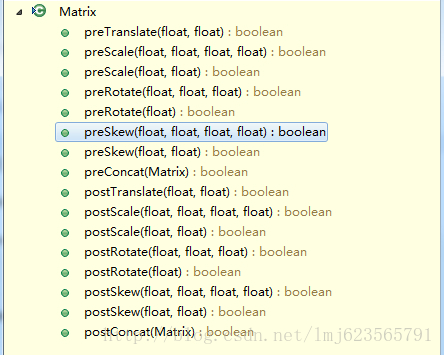
1、Matrix
矩阵,看深入了都是3维矩阵的乘啊什么的,怪麻烦的~~
其实这么了解下就行了:
Matrix
数据结构:3维矩阵;
内部存储:new Float[9] ; 内部就是个一维数组,内部9个元素;可以进行setValues(float[] values)进行初始化
每个元素代表的意思:
- {
- MSCALE_X, MSKEW_X, MTRANS_X,
- MSKEW_Y, MSCALE_Y, MTRANS_Y,
- MPERSP_0, MPERSP_1, MPERSP_2
- };
字面上,应该能看出来哪个代表x方向缩放,哪个代表垂直方向的偏移量吧~~有不认识的3个,没事,请无视。
操作
比如你想要设置matrix的偏移量为200,100
你可以这么写:
- Matrix transMatrix = new Matrix();
- float[] values = new float[] { 1.0, 0, 200, 0, 1.0, 100, 0, 0, 1.0 };
- transMatrix.setValues(values);
如果需要在旋转30度,放大两倍~~
这么写其实怪麻烦的~~
Matrix提供了一些常用的API:例如我们可以这么写:
- Matrix transMatrix = new Matrix();
- transMatrix.postTranslate(200, 100);
如何获取值:
当然了,我们对一个Matrix进行了各种操作,一会postScale,一会postTranslate;那么现在如何获得当前的缩放比例:
前面说setValues可以初始化,那么getValues就能拿到当前矩阵的值,拿到的是个一维数组,9个元素;再通过下标取对应值就可以。
比如我想知道现在x方向缩放比例:
- public final float getScale()
- {
- scaleMatrix.getValues(matrixValues);
- return matrixValues[Matrix.MSCALE_X];
- }
好了,知道这些就够了~~
2、GestureDetector
嗯,自己看API,能够捕捉到长按、双击什么的;用法会在例子中
3、ScaleGestureDetector
嗯,有点像继承来的,其实不是的,独立的一个类~用于检测缩放的手势~~~用法会在例子中
3、实战
为了大家更好的理解,我会独立出每个功能,最后再整合到一起~~也方面大家对每个API的使用的学习。
1、自由的缩放
需求:当图片加载时,将图片在屏幕中居中;图片宽或高大于屏幕的,缩小至屏幕大小;自由对图片进行方法或缩小;
代码不是很长,直接贴代码了:
- package com.zhy.view;
- import android.content.Context;
- import android.graphics.Matrix;
- import android.graphics.drawable.Drawable;
- import android.util.AttributeSet;
- import android.util.Log;
- import android.view.MotionEvent;
- import android.view.ScaleGestureDetector;
- import android.view.ScaleGestureDetector.OnScaleGestureListener;
- import android.view.View;
- import android.view.View.OnTouchListener;
- import android.view.ViewTreeObserver;
- import android.widget.ImageView;
- public class ZoomImageView extends ImageView implements OnScaleGestureListener,
- OnTouchListener, ViewTreeObserver.OnGlobalLayoutListener
- {
- private static final String TAG = ZoomImageView.class.getSimpleName();
- public static final float SCALE_MAX = 4.0f;
- /**
- * 初始化时的缩放比例,如果图片宽或高大于屏幕,此值将小于0
- */
- private float initScale = 1.0f;
- /**
- * 用于存放矩阵的9个值
- */
- private final float[] matrixValues = new float[9];
- private boolean once = true;
- /**
- * 缩放的手势检测
- */
- private ScaleGestureDetector mScaleGestureDetector = null;
- private final Matrix mScaleMatrix = new Matrix();
- public ZoomImageView(Context context)
- {
- this(context, null);
- }
- public ZoomImageView(Context context, AttributeSet attrs)
- {
- super(context, attrs);
- super.setScaleType(ScaleType.MATRIX);
- mScaleGestureDetector = new ScaleGestureDetector(context, this);
- this.setOnTouchListener(this);
- }
- @Override
- public boolean onScale(ScaleGestureDetector detector)
- {
- float scale = getScale();
- float scaleFactor = detector.getScaleFactor();
- if (getDrawable() == null)
- return true;
- /**
- * 缩放的范围控制
- */
- if ((scale < SCALE_MAX && scaleFactor > 1.0f)
- || (scale > initScale && scaleFactor < 1.0f))
- {
- /**
- * 最大值最小值判断
- */
- if (scaleFactor * scale < initScale)
- {
- scaleFactor = initScale / scale;
- }
- if (scaleFactor * scale > SCALE_MAX)
- {
- scaleFactor = SCALE_MAX / scale;
- }
- /**
- * 设置缩放比例
- */
- mScaleMatrix.postScale(scaleFactor, scaleFactor, getWidth() / 2,
- getHeight() / 2);
- setImageMatrix(mScaleMatrix);
- }
- return true;
- }
- @Override
- public boolean onScaleBegin(ScaleGestureDetector detector)
- {
- return true;
- }
- @Override
- public void onScaleEnd(ScaleGestureDetector detector)
- {
- }
- @Override
- public boolean onTouch(View v, MotionEvent event)
- {
- return mScaleGestureDetector.onTouchEvent(event);
- }
- /**
- * 获得当前的缩放比例
- *
- * @return
- */
- public final float getScale()
- {
- mScaleMatrix.getValues(matrixValues);
- return matrixValues[Matrix.MSCALE_X];
- }
- @Override
- protected void onAttachedToWindow()
- {
- super.onAttachedToWindow();
- getViewTreeObserver().addOnGlobalLayoutListener(this);
- }
- @SuppressWarnings("deprecation")
- @Override
- protected void onDetachedFromWindow()
- {
- super.onDetachedFromWindow();
- getViewTreeObserver().removeGlobalOnLayoutListener(this);
- }
- @Override
- public void onGlobalLayout()
- {
- if (once)
- {
- Drawable d = getDrawable();
- if (d == null)
- return;
- Log.e(TAG, d.getIntrinsicWidth() + " , " + d.getIntrinsicHeight());
- int width = getWidth();
- int height = getHeight();
- // 拿到图片的宽和高
- int dw = d.getIntrinsicWidth();
- int dh = d.getIntrinsicHeight();
- float scale = 1.0f;
- // 如果图片的宽或者高大于屏幕,则缩放至屏幕的宽或者高
- if (dw > width && dh <= height)
- {
- scale = width * 1.0f / dw;
- }
- if (dh > height && dw <= width)
- {
- scale = height * 1.0f / dh;
- }
- // 如果宽和高都大于屏幕,则让其按按比例适应屏幕大小
- if (dw > width && dh > height)
- {
- scale = Math.min(dw * 1.0f / width, dh * 1.0f / height);
- }
- initScale = scale;
- // 图片移动至屏幕中心
- mScaleMatrix.postTranslate((width - dw) / 2, (height - dh) / 2);
- mScaleMatrix
- .postScale(scale, scale, getWidth() / 2, getHeight() / 2);
- setImageMatrix(mScaleMatrix);
- once = false;
- }
- }
- }
1、我们在onGlobalLayout的回调中,根据图片的宽和高以及屏幕的宽和高,对图片进行缩放以及移动至屏幕的中心。如果图片很小,那就正常显示,不放大了~
2、我们让OnTouchListener的MotionEvent交给ScaleGestureDetector进行处理
- @Override
- public boolean onTouch(View v, MotionEvent event)
- {
- return mScaleGestureDetector.onTouchEvent(event);
- }
3、在onScale的回调中对图片进行缩放的控制,首先进行缩放范围的判断,然后设置mScaleMatrix的scale值
现在的效果:
1、小于屏幕的宽和高

2、大于屏幕的宽和高
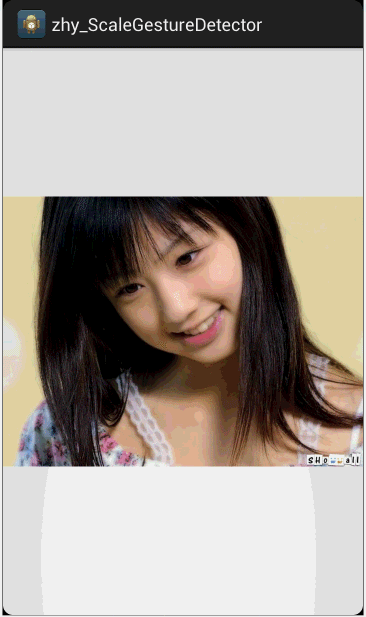
真机录的效果不太好~~凑合看~
现在已经能够~~~随意的放大缩小了~~~
源码点击下载
可是,可是,存在问题:
1、缩放的中心点,我们设置是固定的,屏幕中间
2、放大后,无法移动~
下面,我们先解决缩放的中心点问题,不能一直按屏幕中心么,像我这样的,我比较关注妹子的眼睛,我要放大那一块~~~
2、设置缩放中心
1、单纯的设置缩放中心
仅仅是设置中心很简单,直接修改下中心点 :
- /**
- * 设置缩放比例
- */
- mScaleMatrix.postScale(scaleFactor, scaleFactor,
- detector.getFocusX(), detector.getFocusX());
- setImageMatrix(mScaleMatrix);
但是,随意的中心点放大、缩小,会导致图片的位置的变化,最终导致,图片宽高大于屏幕时,图片与屏幕间出现白边;图片小于屏幕,但是不居中。
2、控制缩放时图片显示的范围
所以我们在缩放的时候需要手动控制下范围:
- /**
- * 在缩放时,进行图片显示范围的控制
- */
- private void checkBorderAndCenterWhenScale()
- {
- RectF rect = getMatrixRectF();
- float deltaX = 0;
- float deltaY = 0;
- int width = getWidth();
- int height = getHeight();
- // 如果宽或高大于屏幕,则控制范围
- if (rect.width() >= width)
- {
- if (rect.left > 0)
- {
- deltaX = -rect.left;
- }
- if (rect.right < width)
- {
- deltaX = width - rect.right;
- }
- }
- if (rect.height() >= height)
- {
- if (rect.top > 0)
- {
- deltaY = -rect.top;
- }
- if (rect.bottom < height)
- {
- deltaY = height - rect.bottom;
- }
- }
- // 如果宽或高小于屏幕,则让其居中
- if (rect.width() < width)
- {
- deltaX = width * 0.5f - rect.right + 0.5f * rect.width();
- }
- if (rect.height() < height)
- {
- deltaY = height * 0.5f - rect.bottom + 0.5f * rect.height();
- }
- Log.e(TAG, "deltaX = " + deltaX + " , deltaY = " + deltaY);
- mScaleMatrix.postTranslate(deltaX, deltaY);
- }
- /**
- * 根据当前图片的Matrix获得图片的范围
- *
- * @return
- */
- private RectF getMatrixRectF()
- {
- Matrix matrix = mScaleMatrix;
- RectF rect = new RectF();
- Drawable d = getDrawable();
- if (null != d)
- {
- rect.set(0, 0, d.getIntrinsicWidth(), d.getIntrinsicHeight());
- matrix.mapRect(rect);
- }
- return rect;
- }
在onScale里面记得调用:
- /**
- * 设置缩放比例
- */
- mScaleMatrix.postScale(scaleFactor, scaleFactor,
- detector.getFocusX(), detector.getFocusY());
- checkBorderAndCenterWhenScale();
- setImageMatrix(mScaleMatrix);
这样就好了,可以自由的放大任何地方,并且不会出现边界出现白边,也能很好的让图片显示在屏幕中间(当图片宽或高小于屏幕);
3、贴下布局文件
- <RelativeLayout xmlns:android="http://schemas.android.com/apk/res/android"
- xmlns:tools="http://schemas.android.com/tools"
- android:layout_width="match_parent"
- android:layout_height="match_parent" >
- <com.zhy.view.ZoomImageView
- android:layout_width="fill_parent"
- android:layout_height="fill_parent"
- android:scaleType="matrix"
- android:src="@drawable/xx" />
- </RelativeLayout>
眼睛是心灵的窗户,咱们来放大看看,效果图:

好了,到此我们的图片随意的方法缩小~~~已经完成了~~~如果只需要缩放功能的,就可以拿去用了 不过码农是需要拿来主义的 否则哪来的时间撩妹 今天心情好 再将 测试完后bug 修改后的代码在贴下
package com.library.custom.view;
import android.content.Context;
import android.graphics.Bitmap;
import android.graphics.Canvas;
import android.graphics.Matrix;
import android.graphics.RectF;
import android.graphics.drawable.Drawable;
import android.util.AttributeSet;
import android.view.GestureDetector;
import android.view.GestureDetector.SimpleOnGestureListener;
import android.view.MotionEvent;
import android.view.ScaleGestureDetector;
import android.view.ScaleGestureDetector.OnScaleGestureListener;
import android.view.View;
import android.view.View.OnTouchListener;
import android.view.ViewTreeObserver;
import android.widget.ImageView;
public class CustomZoomImageView extends ImageView implements OnTouchListener {
/**
* 最大放大比率(相较于原图尺寸)
*/
public static float SCALE_MAX = 4.0f;
/**
* 最小放大比率(相较于原图尺寸)
*/
private static float SCALE_MID = 2.0f;
/**
* 初始化时的缩放比例,如果图片宽或高最小值大于屏幕,此值将小于1.0
*/
private float initScale = 1.0f;
private boolean once = true;
/**
* 用于存放矩阵的9个值
*/
private final float[] matrixValues = new float[9];
/**
* 缩放的手势检测
*/
private ScaleGestureDetector mScaleGestureDetector;
private Matrix mScaleMatrix = new Matrix();
/**
* 用于双击检测
*/
private GestureDetector mGestureDetector;
private boolean isAutoScale;
private int mTouchSlop;
private float mLastX;
private float mLastY;
private boolean isCanDrag;
private int lastPointerCount;
private int oldwidth;
private int oldHeight;
/**
* 水平方向与View的边距
*/
private int mHorizontalPadding;
/**
* 垂直方向与View的边距
*/
private int mVerticalPadding;
public CustomZoomImageView(Context context) {
this(context, null);
}
public CustomZoomImageView(Context context, AttributeSet attrs) {
super(context, attrs);
setScaleType(ScaleType.MATRIX);
mGestureDetector = new GestureDetector(context, onDoubleListener);
mScaleGestureDetector = new ScaleGestureDetector(context, mOnScaleListener);
this.setOnTouchListener(this);
getViewTreeObserver().addOnGlobalLayoutListener(onLayoutListener);
}
private SimpleOnGestureListener onDoubleListener = new SimpleOnGestureListener() {
@Override
public boolean onDoubleTap(MotionEvent e) {
if (isAutoScale == true)
return true;
float x = e.getX();
float y = e.getY();
if (getScale() < SCALE_MID) {
CustomZoomImageView.this.postDelayed(
new AutoScaleRunnable(SCALE_MID, x, y), 16);
isAutoScale = true;
} else {
CustomZoomImageView.this.postDelayed(
new AutoScaleRunnable(initScale, x, y), 16);
isAutoScale = true;
}
return true;
}
};
private OnScaleGestureListener mOnScaleListener = new OnScaleGestureListener() {
@Override
public boolean onScale(ScaleGestureDetector detector) {
float scale = getScale();
float scaleFactor = detector.getScaleFactor();
if (getDrawable() == null)
return true;
/**
* 缩放的范围控制
*/
if ((scale < SCALE_MAX && scaleFactor > 1.0f)
|| (scale > initScale && scaleFactor < 1.0f)) {
/**
* 最大值最小值判断
*/
if (scaleFactor * scale < initScale) {
scaleFactor = initScale / scale;
}
if (scaleFactor * scale > SCALE_MAX) {
scaleFactor = SCALE_MAX / scale;
}
/**
* 设置缩放比例
*/
mScaleMatrix.postScale(scaleFactor, scaleFactor,
detector.getFocusX(), detector.getFocusY());
checkBorder();
setImageMatrix(mScaleMatrix);
}
return true;
}
@Override
public boolean onScaleBegin(ScaleGestureDetector detector) {
return true;
}
@Override
public void onScaleEnd(ScaleGestureDetector detector) {
}
};
private ViewTreeObserver.OnGlobalLayoutListener onLayoutListener = new ViewTreeObserver.OnGlobalLayoutListener() {
@Override
public void onGlobalLayout() {
if (once) {
getViewTreeObserver().removeGlobalOnLayoutListener(onLayoutListener);
initScale();
once = false;
}
}
};
/**
* 自动缩放的任务
*
* @author zhy
*/
private class AutoScaleRunnable implements Runnable {
static final float BIGGER = 1.07f;
static final float SMALLER = 0.93f;
private float mTargetScale;
private float tmpScale;
/**
* 缩放的中心
*/
private float x;
private float y;
/**
* 传入目标缩放值,根据目标值与当前值,判断应该放大还是缩小
*
* @param targetScale
*/
public AutoScaleRunnable(float targetScale, float x, float y) {
this.mTargetScale = targetScale;
this.x = x;
this.y = y;
if (getScale() < mTargetScale) {
tmpScale = BIGGER;
} else {
tmpScale = SMALLER;
}
}
@Override
public void run() {
// 进行缩放
mScaleMatrix.postScale(tmpScale, tmpScale, x, y);
checkBorder();
setImageMatrix(mScaleMatrix);
final float currentScale = getScale();
// 如果值在合法范围内,继续缩放
if (((tmpScale > 1f) && (currentScale < mTargetScale))
|| ((tmpScale < 1f) && (mTargetScale < currentScale))) {
CustomZoomImageView.this.postDelayed(this, 16);
} else
// 设置为目标的缩放比例
{
final float deltaScale = mTargetScale / currentScale;
mScaleMatrix.postScale(deltaScale, deltaScale, x, y);
checkBorder();
setImageMatrix(mScaleMatrix);
isAutoScale = false;
}
}
}
/**
* 根据当前图片的Matrix获得图片的范围
*
* @return
*/
private RectF getMatrixRectF() {
Matrix matrix = mScaleMatrix;
RectF rect = new RectF();
Drawable d = getDrawable();
if (null != d) {
rect.set(0, 0, d.getIntrinsicWidth(), d.getIntrinsicHeight());
matrix.mapRect(rect);
}
return rect;
}
@Override
public boolean onTouch(View v, MotionEvent event) {
if (mGestureDetector.onTouchEvent(event))
return true;
mScaleGestureDetector.onTouchEvent(event);
float x = 0, y = 0;
// 拿到触摸点的个数
final int pointerCount = event.getPointerCount();
// 得到多个触摸点的x与y均值
for (int i = 0; i < pointerCount; i++) {
x += event.getX(i);
y += event.getY(i);
}
x = x / pointerCount;
y = y / pointerCount;
/**
* 每当触摸点发生变化时,重置mLasX , mLastY
*/
if (pointerCount != lastPointerCount) {
isCanDrag = false;
mLastX = x;
mLastY = y;
}
lastPointerCount = pointerCount;
switch (event.getAction()) {
case MotionEvent.ACTION_MOVE:
float dx = x - mLastX;
float dy = y - mLastY;
if (!isCanDrag) {
isCanDrag = isCanDrag(dx, dy);
}
if (isCanDrag) {
if (getDrawable() != null) {
RectF rectF = getMatrixRectF();
// 如果宽度小于屏幕宽度,则禁止左右移动
if (rectF.width() <= getWidth() - mHorizontalPadding * 2) {
dx = 0;
}
// 如果高度小雨屏幕高度,则禁止上下移动
if (rectF.height() <= getHeight() - mVerticalPadding * 2) {
dy = 0;
}
mScaleMatrix.postTranslate(dx, dy);
checkBorder();
setImageMatrix(mScaleMatrix);
}
}
mLastX = x;
mLastY = y;
break;
case MotionEvent.ACTION_UP:
case MotionEvent.ACTION_CANCEL:
lastPointerCount = 0;
break;
}
return true;
}
@Override
protected void onMeasure(int widthMeasureSpec, int heightMeasureSpec) {
super.onMeasure(widthMeasureSpec, heightMeasureSpec);
Drawable d = getDrawable();
if (d == null || getWidth() == 0 || once)
return;
initScale();
}
private void initScale() {
Drawable d = getDrawable();
if (d == null)
return;
if (oldwidth != d.getIntrinsicWidth() || oldHeight != d.getIntrinsicHeight()) {
oldwidth = d.getIntrinsicWidth();
oldHeight = d.getIntrinsicHeight();
// 垂直方向的边距
int width = getWidth();
int height = getHeight();
mVerticalPadding = (height - (width - 2 * mHorizontalPadding)) / 2;
// 拿到图片的宽和高
int dw = d.getIntrinsicWidth();
int dh = d.getIntrinsicHeight();
float scale = 1.0f;
int contentWidth = width - mHorizontalPadding * 2;
int contentHeight = height - mVerticalPadding * 2;
if (dw < contentWidth && dh >= contentHeight) {
scale = (width * 1.0f - mHorizontalPadding * 2) / dw;
}
if (dw < contentWidth && dh < contentHeight) {
float scaleW = (width * 1.0f - mHorizontalPadding * 2)
/ dw;
float scaleH = (height * 1.0f - mVerticalPadding * 2) / dh;
scale = Math.max(scaleW, scaleH);
}
if (dw >= contentWidth && dh >= contentHeight) {
float scaleW = (width * 1.0f - mHorizontalPadding * 2)
/ dw;
float scaleH = (height * 1.0f - mVerticalPadding * 2) / dh;
scale = Math.max(scaleW, scaleH);
}
if (dw >= contentWidth && dh < contentHeight) {
scale = (height * 1.0f - mVerticalPadding * 2) / dh;
}
initScale = scale;
SCALE_MID = initScale * 2;
SCALE_MAX = initScale * 4;
mScaleMatrix = new Matrix();
mScaleMatrix.postTranslate((width - dw) / 2, (height - dh) / 2);
mScaleMatrix.postScale(scale, scale, width / 2,
height / 2);
// 图片移动至屏幕中心
setImageMatrix(mScaleMatrix);
}
}
/**
* 获得当前的缩放比例
*
* @return
*/
public final float getScale() {
mScaleMatrix.getValues(matrixValues);
return matrixValues[Matrix.MSCALE_X];
}
/**
* 剪切图片,返回剪切后的bitmap对象
*
* @return
*/
public Bitmap clip() {
Bitmap bitmap = Bitmap.createBitmap(getWidth(), getHeight(),
Bitmap.Config.ARGB_8888);
Canvas canvas = new Canvas(bitmap);
draw(canvas);
Bitmap chipResult = Bitmap.createBitmap(bitmap, mHorizontalPadding,
mVerticalPadding, getWidth() - 2 * mHorizontalPadding,
getWidth() - 2 * mHorizontalPadding);
if (chipResult != bitmap) {
bitmap.recycle();
}
return chipResult;
}
/**
* 边界检测
*/
private void checkBorder() {
RectF rect = getMatrixRectF();
float deltaX = 0;
float deltaY = 0;
int width = getWidth();
int height = getHeight();
// 如果宽或高大于屏幕,则控制范围 ; 这里的0.001是因为精度丢失会产生问题,但是误差一般很小,所以我们直接加了一个0.01
if (rect.width() + 0.01 >= width - 2 * mHorizontalPadding) {
if (rect.left > mHorizontalPadding) {
deltaX = -rect.left + mHorizontalPadding;
}
if (rect.right < width - mHorizontalPadding) {
deltaX = width - mHorizontalPadding - rect.right;
}
}
if (rect.height() + 0.01 >= height - 2 * mVerticalPadding) {
if (rect.top > mVerticalPadding) {
deltaY = -rect.top + mVerticalPadding;
}
if (rect.bottom < height - mVerticalPadding) {
deltaY = height - mVerticalPadding - rect.bottom;
}
}
mScaleMatrix.postTranslate(deltaX, deltaY);
}
/**
* 是否是拖动行为
*
* @param dx
* @param dy
* @return
*/
private boolean isCanDrag(float dx, float dy) {
return Math.sqrt((dx * dx) + (dy * dy)) >= mTouchSlop;
}
public void setHorizontalPadding(int mHorizontalPadding) {
this.mHorizontalPadding = mHorizontalPadding;
}
}